Gyro and motion controls
Gyro mappings translate controller rotation into mouse or virtual-stick movement.
On this page
Set it up
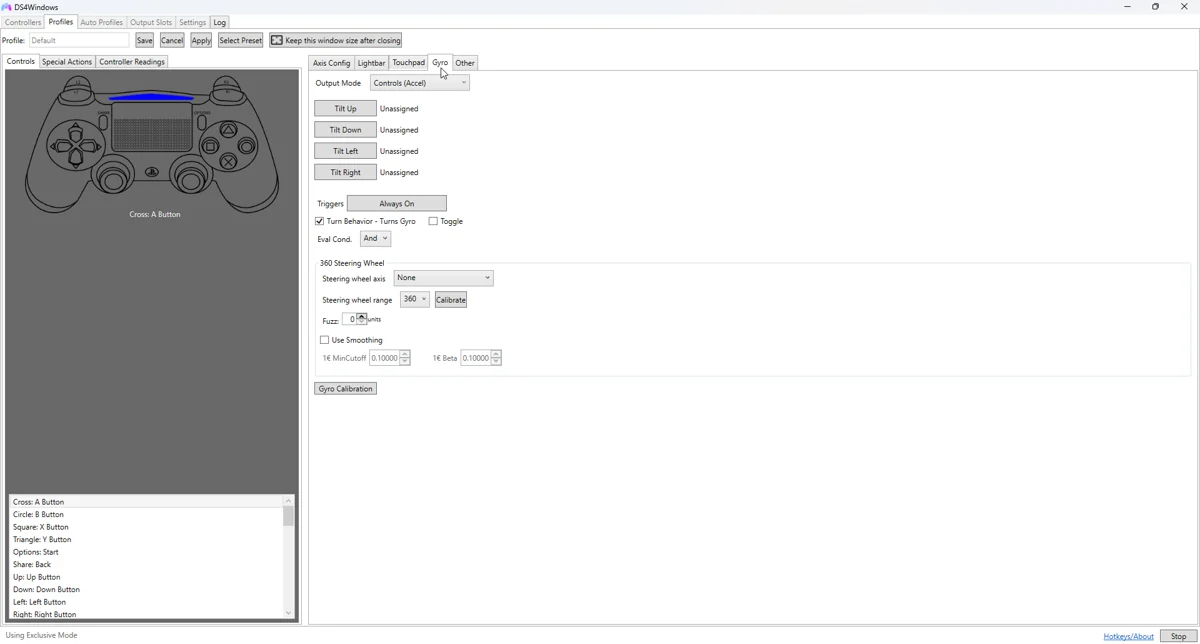
Create a copy of the baseline profile. Choose the gyro output mode supported by your build, then bind a deliberate activation control such as a trigger or touchpad gesture. Starting with an activation control makes unwanted camera movement easier to diagnose.
Apply and test
For mouse-style aim, test small rotations and align horizontal and vertical directions. Adjust sensitivity slowly, then add smoothing only if necessary. Too much smoothing can hide noise while also making motion feel delayed.
Fine-tune the behaviour
For stick-style output, account for the game’s stick deadzone and response curve. A rotation-to-stick mapping will not necessarily behave like a raw mouse. Check whether the game changes input prompts or ignores simultaneous mouse and controller input.
Common pitfalls
A stationary controller should not produce a steady camera turn after appropriate calibration. Use the app’s supported gyro calibration procedure if offered. Keep the controller still during calibration and avoid copying numerical offsets from another device.
Verify before keeping the change
- Save a copy of the last working profile.
- Select the changed profile on the controller you are testing.
- Test in Windows, then in the target game or application.
- Compare with the unchanged baseline if behaviour is unexpected.
- Back up the working result and change only one further variable at a time.
Related guides
Sources: Nexus release documentation · Project and screenshot credits. Updated 11 November 2026.