How to install and set up DS4Windows
Start with one controller, one remapping application and a known data-capable USB cable.
On this page
Before you begin
Check Windows architecture, your selected edition and the runtime it requires. Nexus v1 supports Windows 10 build 19041+ and Windows 11 x64. Ryochan7 is a legacy application with older dependencies. Back up existing profiles before experimenting.
- Close other copies of DS4Windows and controller-remapping tools.
- Keep the full extracted application folder together.
- Driver installation can need administrator approval and a restart. Day-to-day use should normally run with ordinary user permissions.
Nexus v1: first-run setup
- Download Nexus x64 if .NET 10 Desktop Runtime x64 is already installed; otherwise choose the First-Run bundle.
- Extract the DS4Windows Nexus x64 folder into a location you can keep.
- In the First-Run package, run First Run.cmd. It installs the included Microsoft runtime if missing, then opens Nexus.
- Complete Controller and Driver Setup. Nexus uses VIIPER and USBIP for virtual output; do not substitute a random backend build during setup.
- Restart Windows when setup requires it, then reopen Nexus and let setup resume.
- Connect the controller. Select it in the sidebar, choose a profile and check Output to games. Test basic buttons before adding effects.
Ryochan7: classic setup
- Install the Microsoft .NET Desktop Runtime version required by your exact build; the Ryochan7 3.3.3 archive uses .NET 8.
- Extract the ZIP to a writable folder. Run DS4Windows.exe and choose where to store settings.
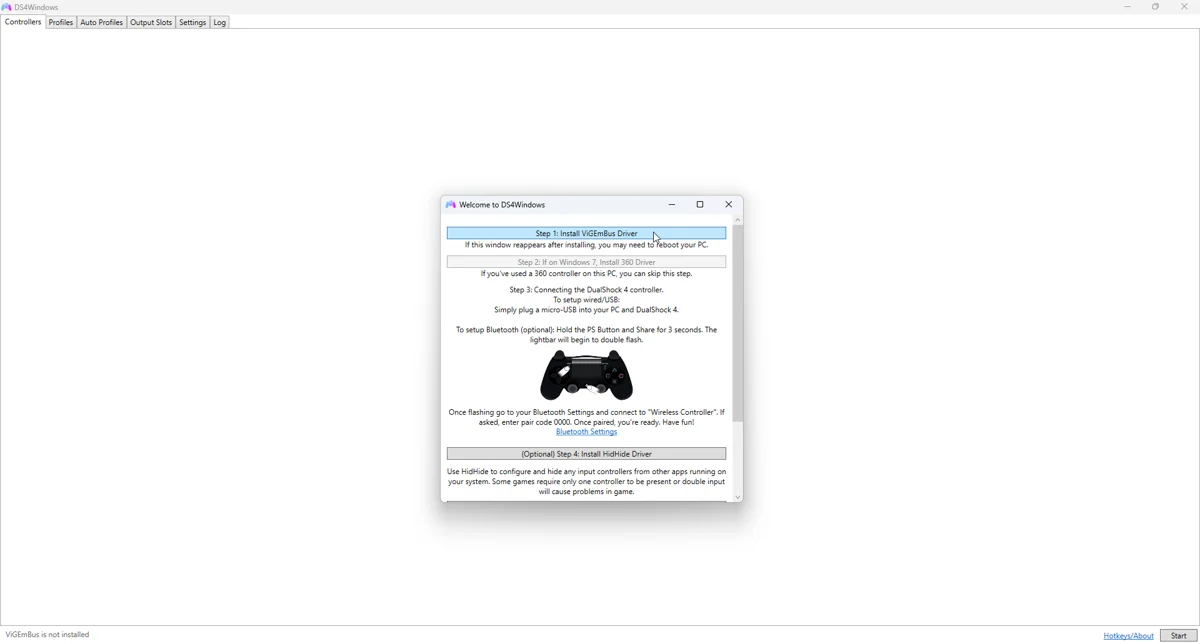
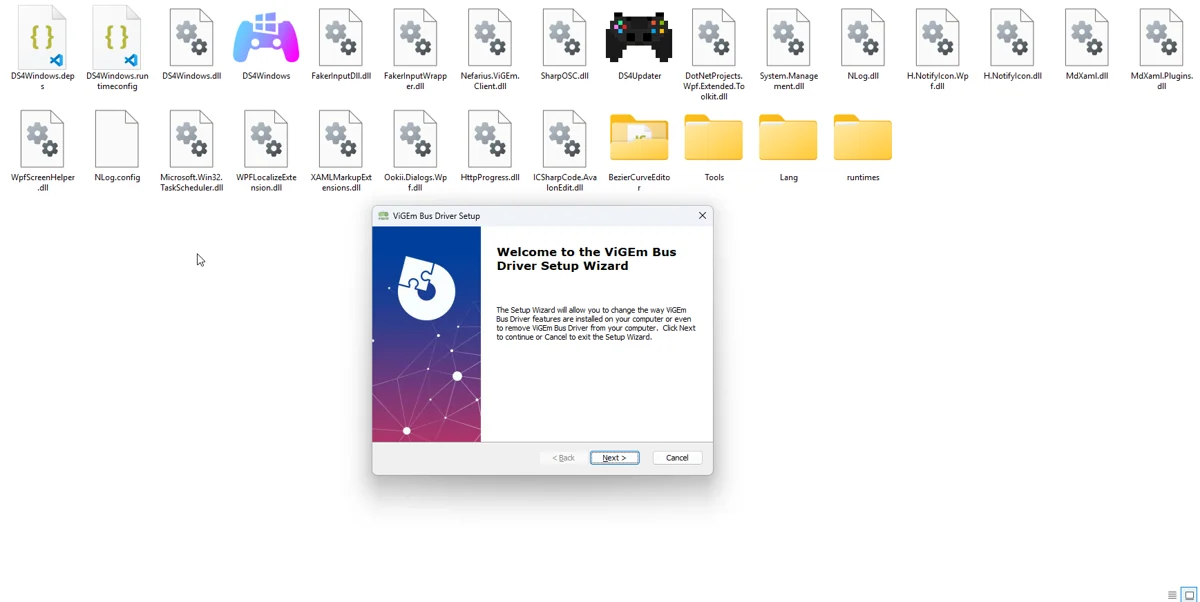
- Open Controller/Driver Setup and install ViGEmBus for virtual Xbox 360 or DualShock 4 output. Restart if requested.
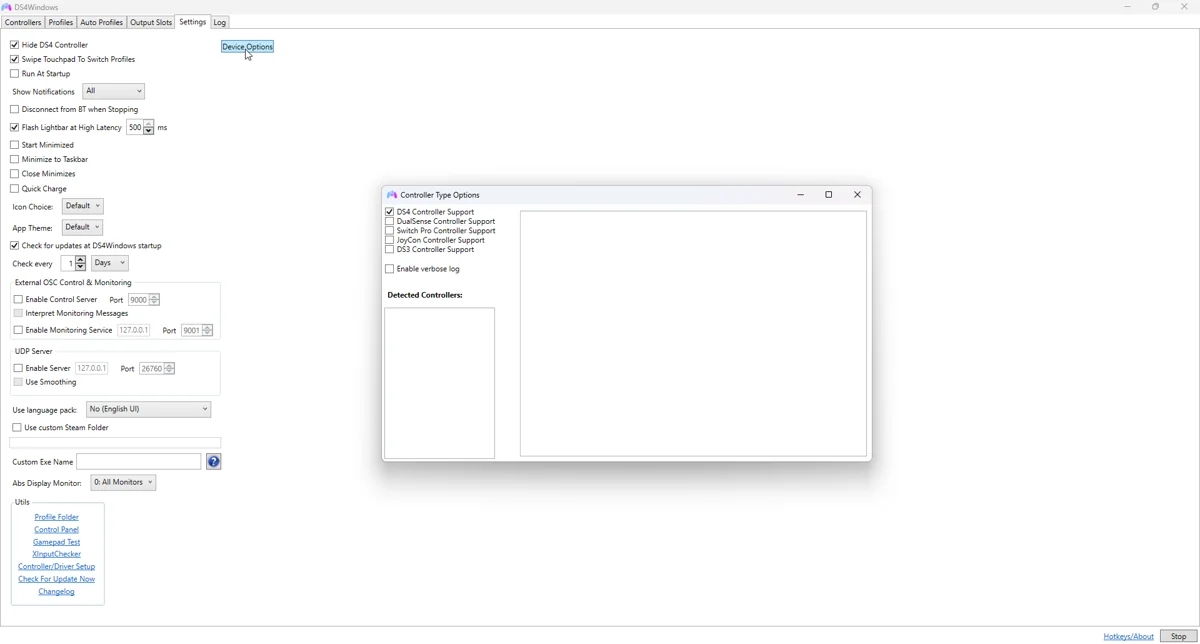
- Connect a controller. In Settings > Device Options, enable its controller family if the classic build is not scanning for it.
- Choose a simple profile with Xbox 360 output for an initial compatibility test.
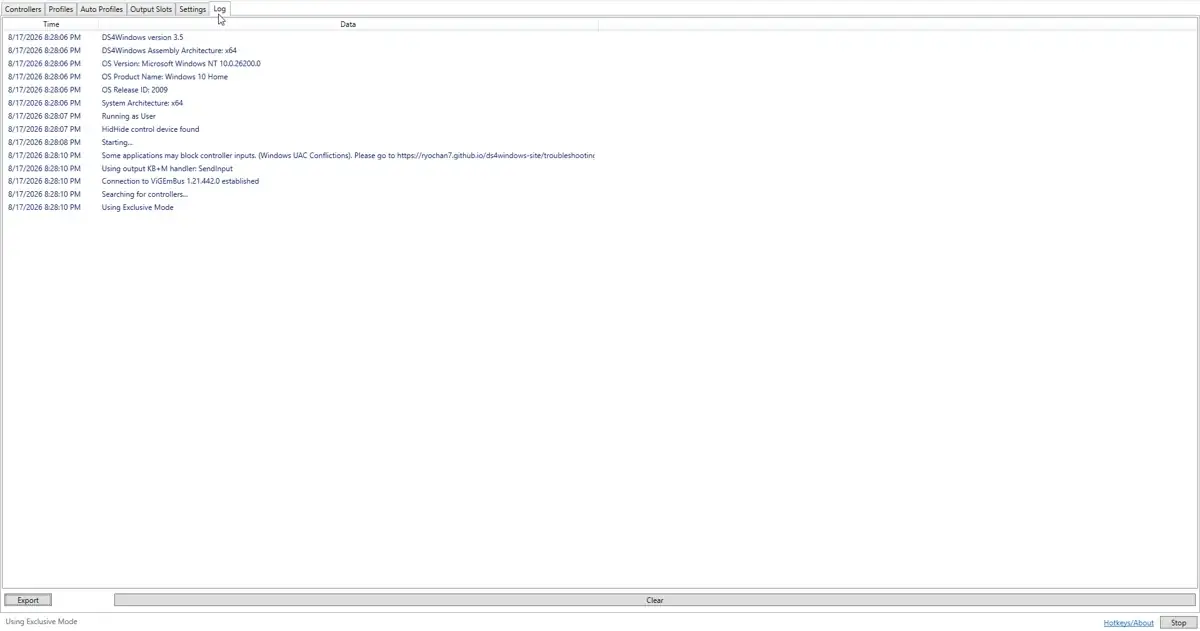
- Read the Log tab if output creation fails; controller detection and virtual output are separate stages.
Connect over USB, then Bluetooth
A charging light is not proof that the cable carries data. Use a direct PC USB port for the first test. To pair a DualShock 4, hold PS + Share while the controller is off until the light flashes. On DualSense or Edge, use PS + Create. Add the device through Windows Bluetooth settings. Switch Pro and Joy-Cons use their sync buttons.
Configure HidHide only if needed
- Install HidHide from its project source or the app setup option, and restart if requested.
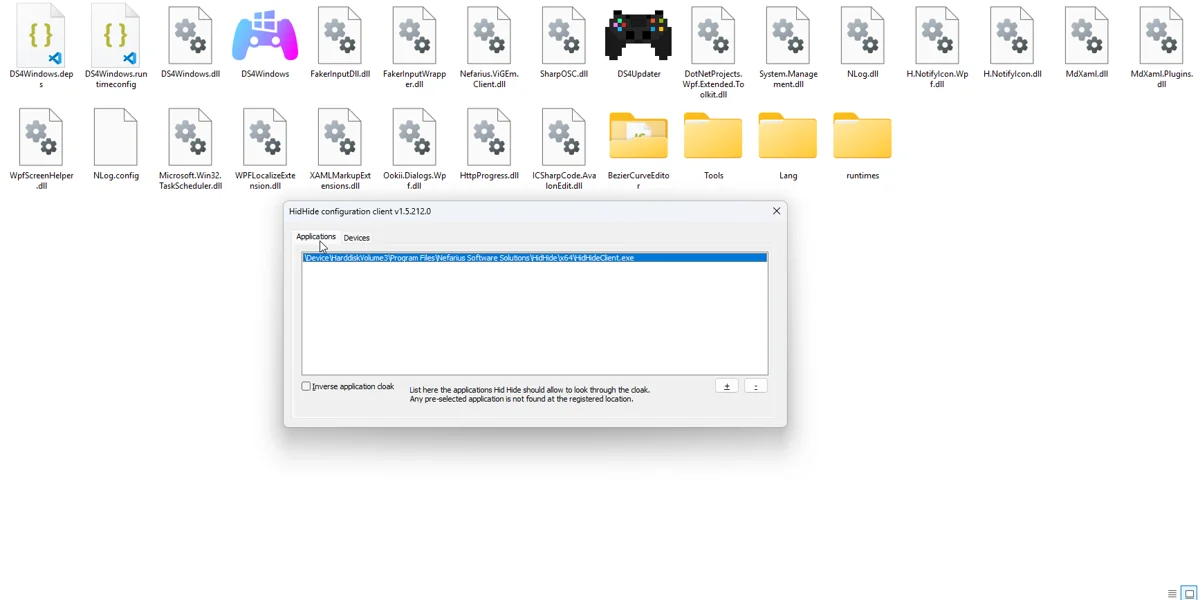
- In the Applications tab, allow the actual DS4Windows.exe path you will run.
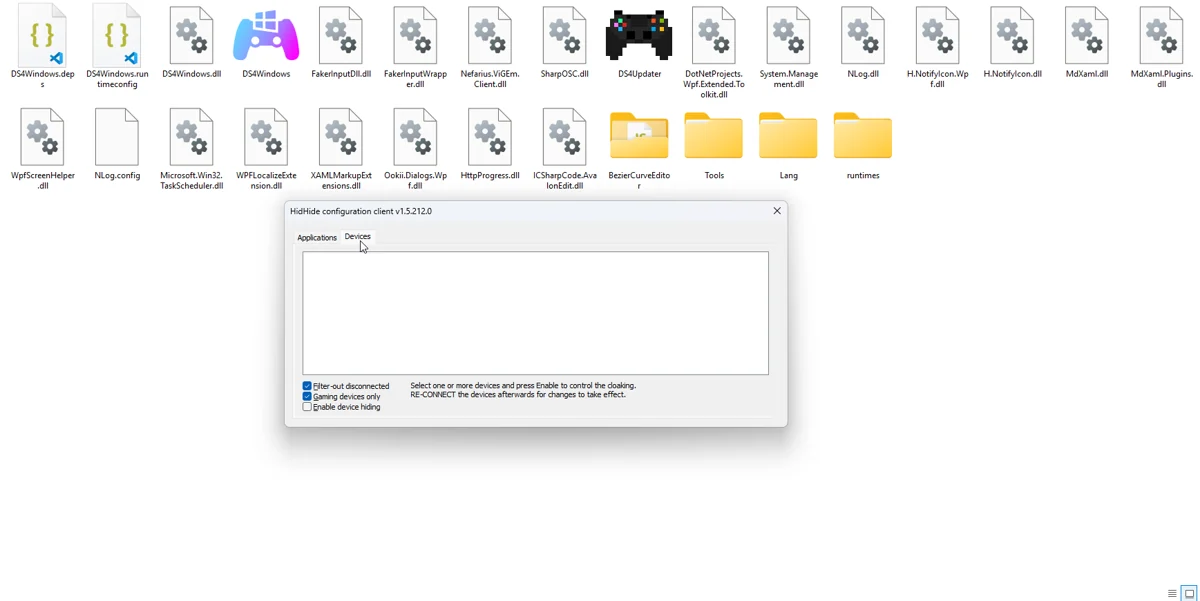
- In Devices, select the physical controller. Do not select the virtual Xbox or PlayStation output.
- Enable device hiding and leave inverse application cloak off for the normal setup.
- Reconnect the controller. USB and Bluetooth can be separate device entries and need separate rules.
- When using HidHide with a classic build, leave the older Hide DS4 Controller option off while diagnosing.
Prove the output works
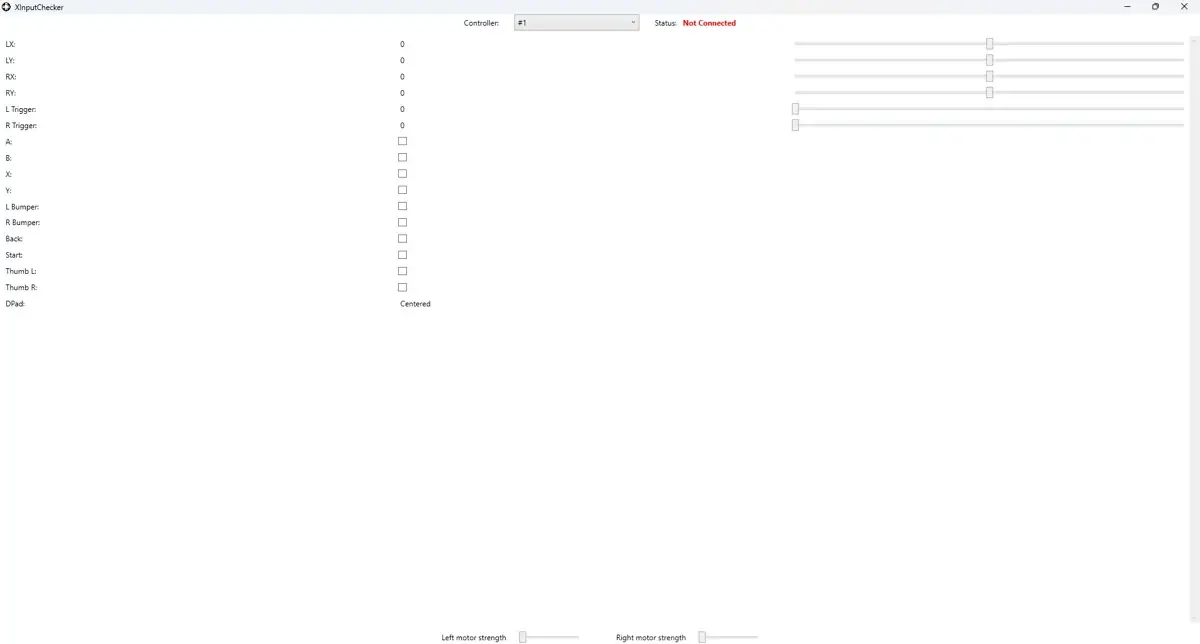
Open Windows Run, enter joy.cpl and inspect the intended virtual controller. Test buttons, sticks and trigger travel. A browser tester can also help, but its device list depends on browser permissions and HidHide visibility. One virtual controller responding correctly is the initial target.
Add audio and trigger effects in Nexus
Audio Haptics turns a capture source into grip vibration; it is separate from audible controller-speaker streaming. Choose the source in Audio Haptics and run its short test. For speaker sound, use Overview > Quick Settings, enable Stream audio to controller, turn Headset only off and check speaker volume. On DualSense Edge, set both physical rear trigger stops to full travel before testing Trigger Lab resistance.
If setup fails
If Windows cannot see the controller, check cable or pairing. If Windows sees it but DS4Windows does not, check controller-family support and HidHide. If DS4Windows sees it but games do not, check the active profile and virtual backend. If every action happens twice, investigate duplicate physical and virtual input rather than reinstalling everything.
Keep a recoverable configuration
Once the test works, save a plainly named baseline profile and back it up. Add one feature at a time. If a change breaks a game, return to the baseline to separate a profile problem from a transport or driver failure.
Related guides
Sources: Nexus release documentation · Project and screenshot credits. Updated 11 November 2026.